
![]()
A 1965 Gibson SG Restored & Refinished
![]()
A 1965 Gibson SG Restored & Refinished
By the time some guitars find their way here, some have had more than their fair share of owners, and repairs that have been less than ideal. There are times when the owners fancy themselves skilled enough to perform repair projects, and get in over their heads.This Gibson SG is one such case. When it was purchased by the original owner, it was a beautiful Cherry wood finished instrument. Along the way, one of it's owners decided it would look better in a black finish. The guitar was sanded and painted black.
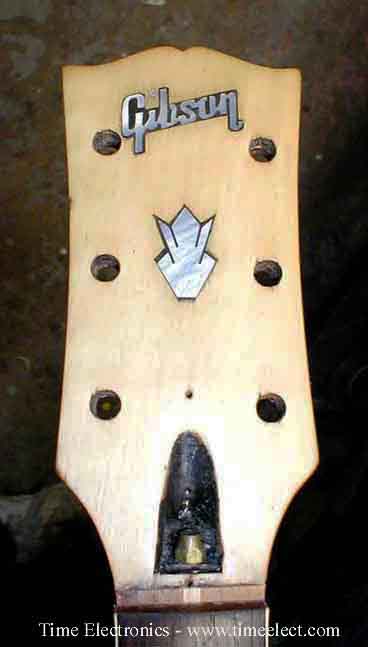
I guess the next owner thought the black finish was not very appealing, and wanted something more towards a natural wood look. The instrument was then sanded, and oil stained a dark brown color. The front of the headstock was sanded, along with the inlays.
Yes, when it came in the shop, it was a real Ugly Stick, if I ever saw one. It was in really bad shape. It's new owner had purchased it on the internet, and I was told that during a shipment mishap, the neck was broken off. He had the neck reset for more money than I'd ever charge. But, none the less, it found it's way to my hands to restore as best as possible to it's Original appearance.
This is one of those times I had wished I had taken pictures at the very beginning when it first arrived. However, I had to test to see just how far the oil stain had gone below the surface to see is a lacquer finish was in the cards.Test spots were selected to treat with chemicals to leach out the oil that remained in the wood. Then, the areas sanded, and test sprayed with lacquer to see if "Fish Eye" appeared. Which it did, and the chemical treatment got started.
I really did not give this guitar much hope of it taking a lacquer finish by the initial testing. However, after more than a week with the chemicals and sanding, thing started to look good. No "Fish Eye" was appearing in the sanded spots now.
Now it became more of a question of just how much wood would have to be sanded to get to an even color though out for the final appearance. Now the rest of the guitar had to catch up to the test areas.
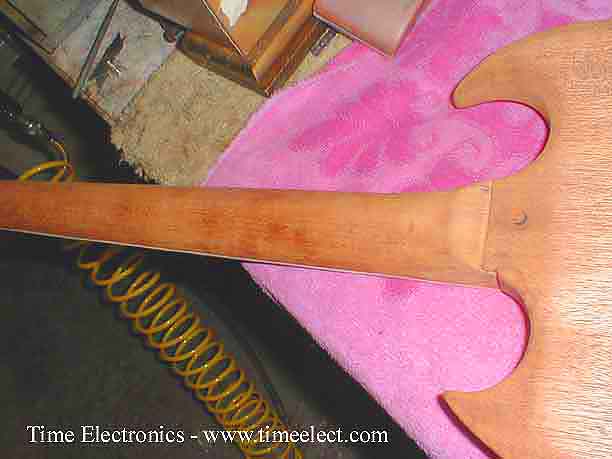
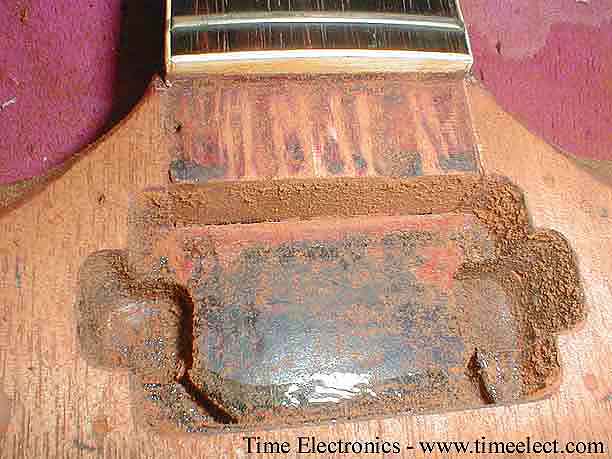
Here you can see how dark the brown stain was on the guitar when it first arrived.
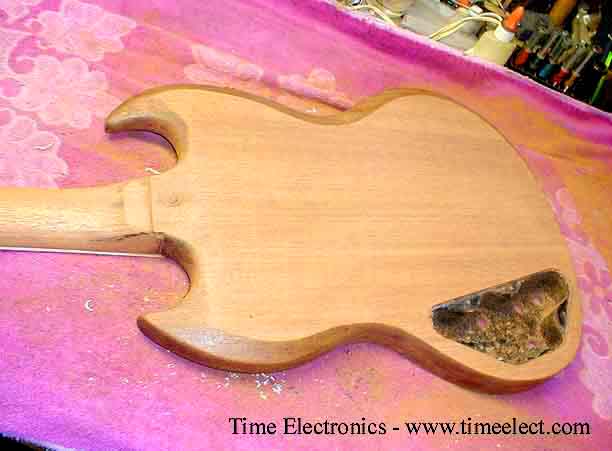
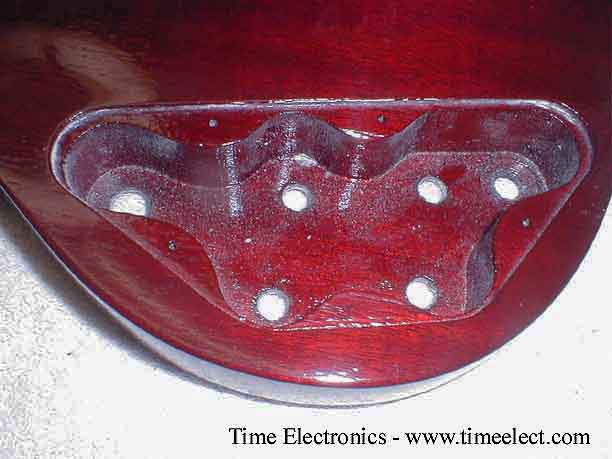
In the control cavity, you can see the black paint from the previous finish job, that had been performed. That was later all cleaned out.
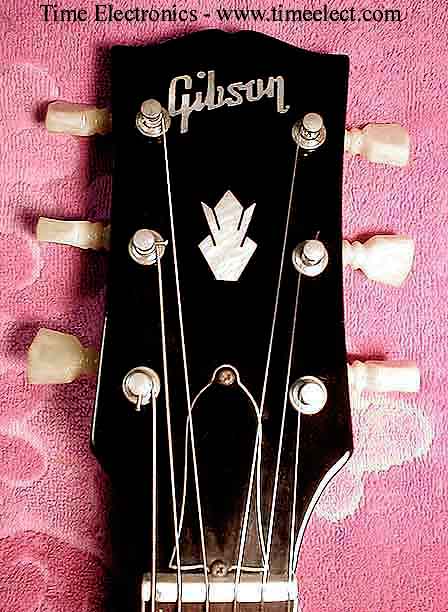
You can see some of the Original Factory Cherry Finish still on the sanded neck.
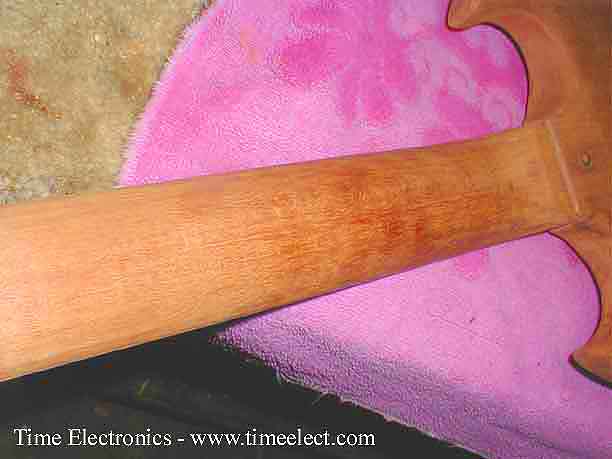
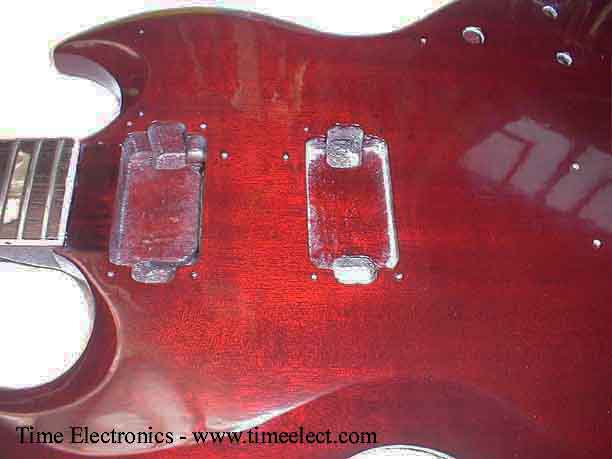
Working our way from the headstock to the body, you can see the difference in the coloration of the wood. That all has to be removed for the new finish to look right.
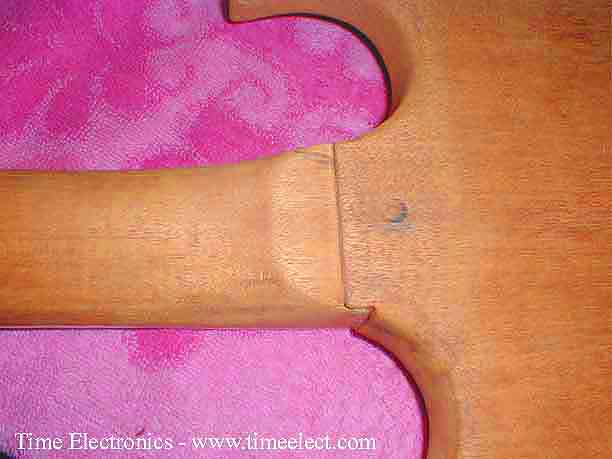
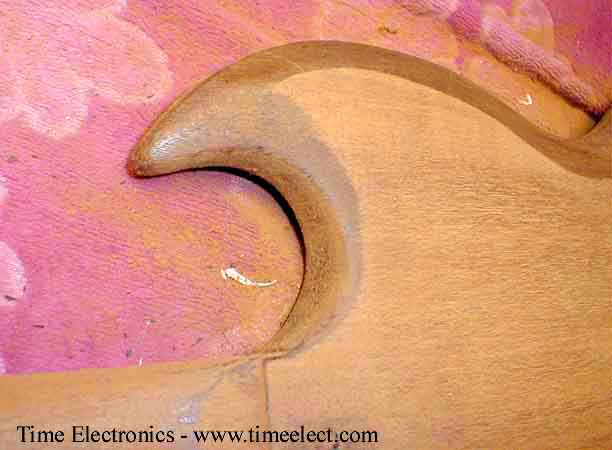
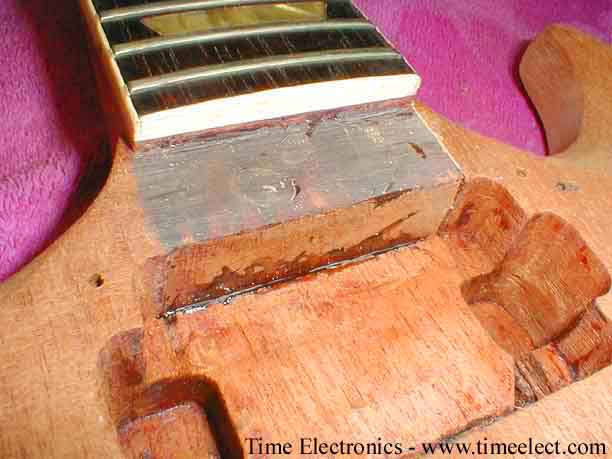
Here you can see the missing wood from the fellow who did the neck reset. On the other side there was some shim stock sticking out that later was air brushed with color to try to hide it under the finish.
You can see that things are starting to look better now, and hope for good results is now looking good.
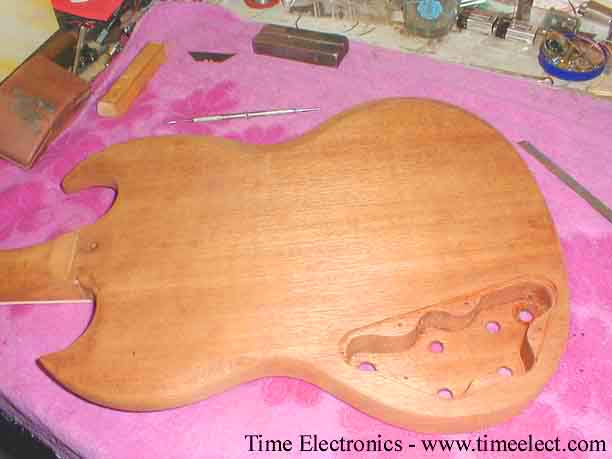
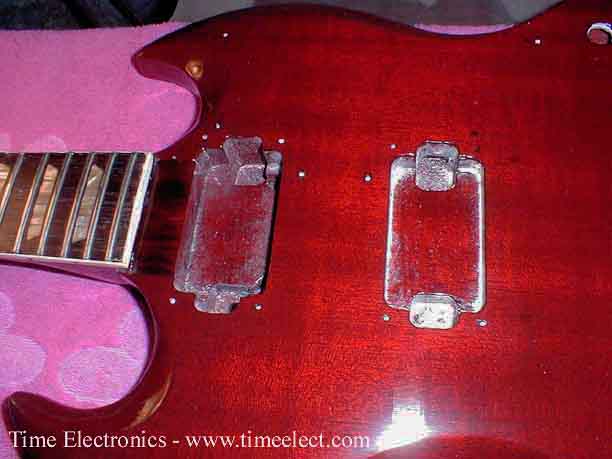
Here you can see work in progress showing the black finish in the pickup cavity. I have no idea how the wood in front of the neck binding got in the condition it is in. That will be fixed up later on.
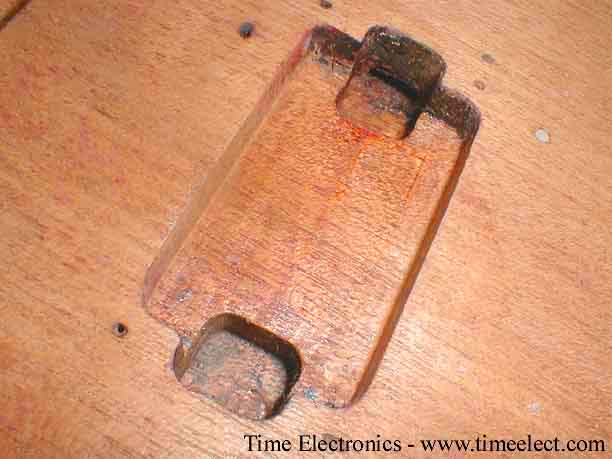
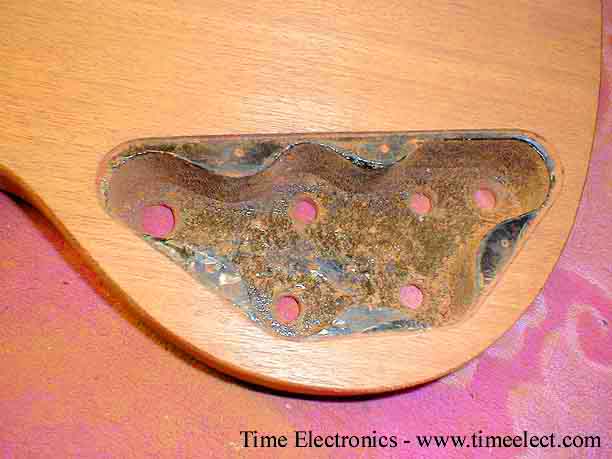
Here most of the pickup cavity for the bridge pickup has been cleaned
out of the old finishes.
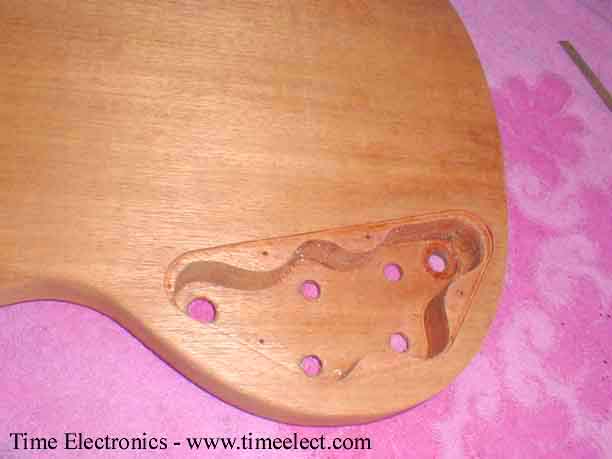
Almost ready for paint.
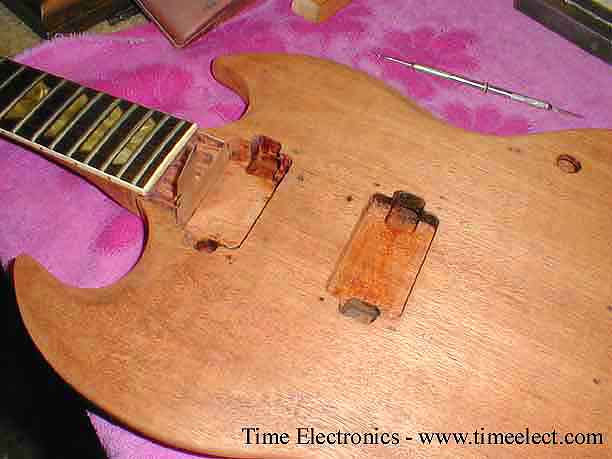
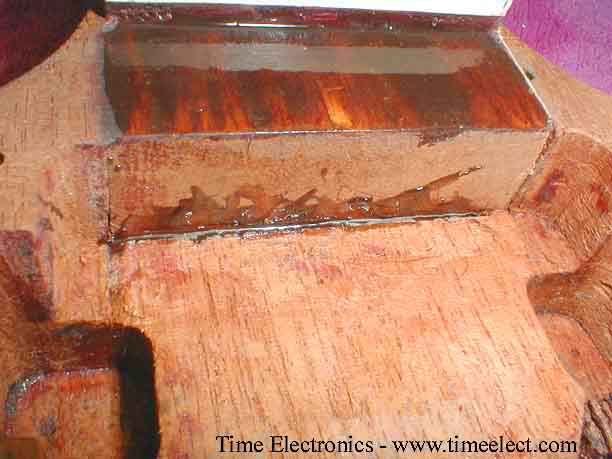
But then, a major problem was uncovered. Notice the razor blade
in the neck pickup cavity.
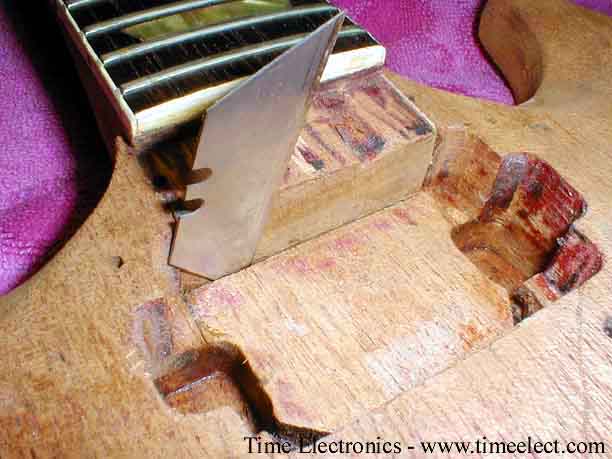
Yes, that is a seperation of what was once one piece of wood. With that seperation, only the small sections of wood from the razor blade towards the headstock, on each side of the neck, is the only wood holding the neck to the body. Drop this guitar, and it's two pieces of wood all over again.
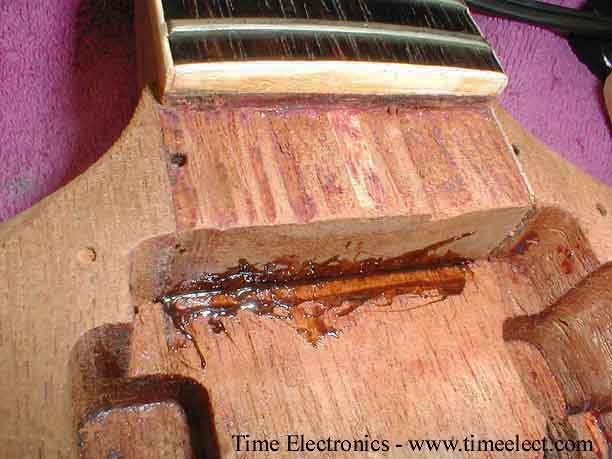
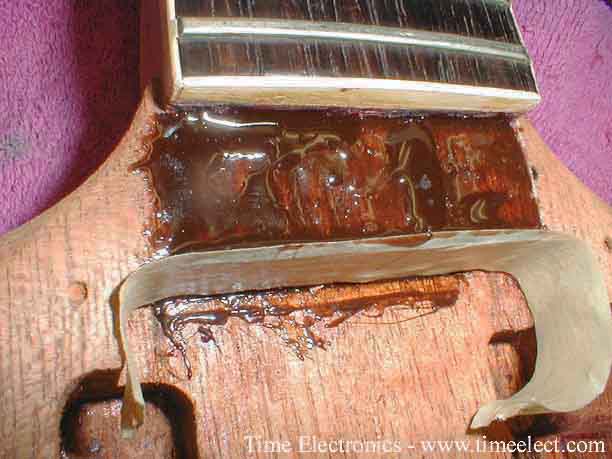
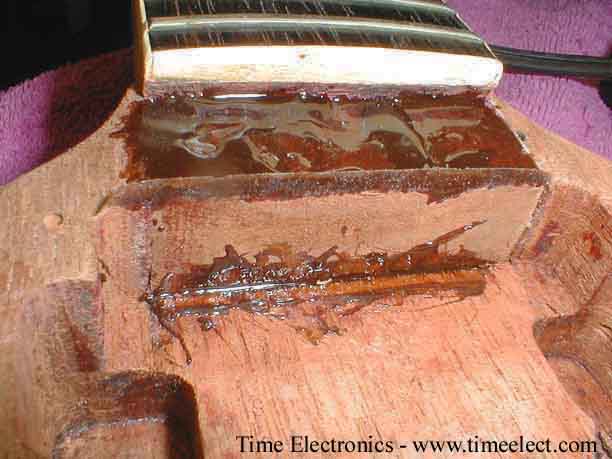
After a long talk with the new owner of this guitar, we decided to take a conservative approach. We would place our trust in some very good epoxy, the glue used by the fellow who reset the neck, and to take precautions for the future of this guitar.Notice the light color material used as shim stock for the neck reset from the previous repairman. A sliver of wood taken from the pickup cavity would have been the thing to use.
Here, we are going to fill in the recesses in that section in front
of neck binding.
Then, sand it down.
Then, give it a smooth finish.
At this point, I decided to cut down the amout of pictures, and hit
the fast forward button.
Here, the headstock was painted black, the black paint removed from the inlays, and around 15 coats of clear shot on the headstock. This was then sanded flat to smoothen out the ripples in the headstock surface from the sanding by one of the past so-called experts in such matters.
The paint has now been applied, and left to sit for week. The guitar was then wet sanded to fine grit, and a medimum compound used.
Later, it is compounded again with very fine compound.
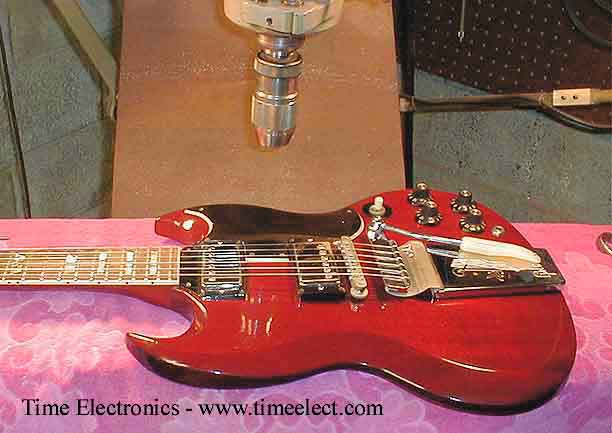
Here you can see how the control cavity turned out. Looks almost
Original.
A little more fine compound, and it's done.
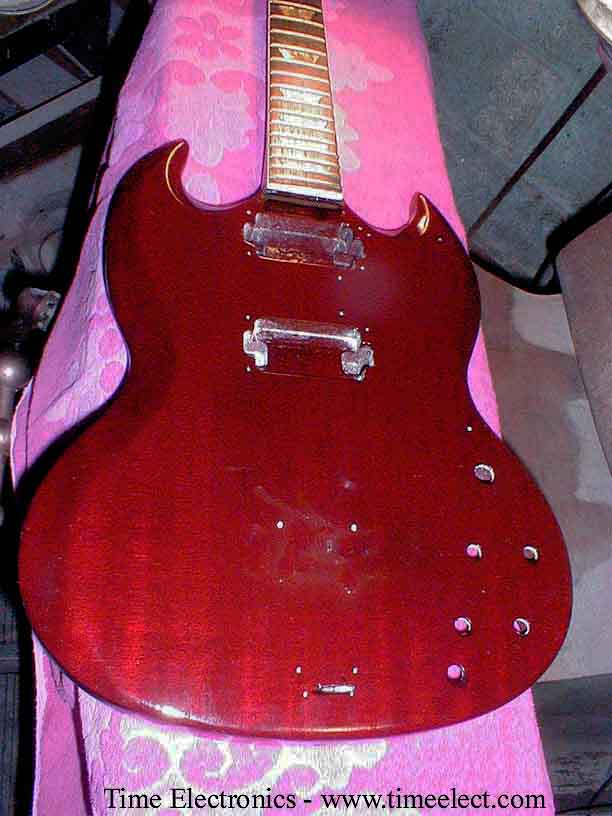
Remember that first picture at the top of this page?
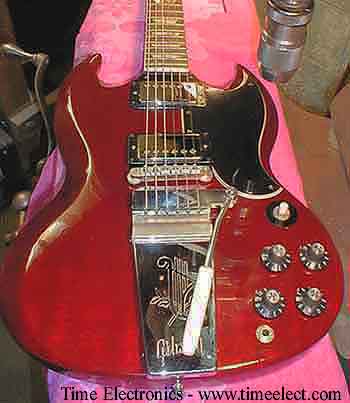
Looking Good
Yes, this is that same guitar that you saw at the top of this page.
©Copyright R.K.Koerner 2001 All Rights
Reserved.
|