
Replacing Original Gibson Fretless Wonders

Today, not many remember the Original Gibson Fretless Wonders, that
Gibson had used years ago.
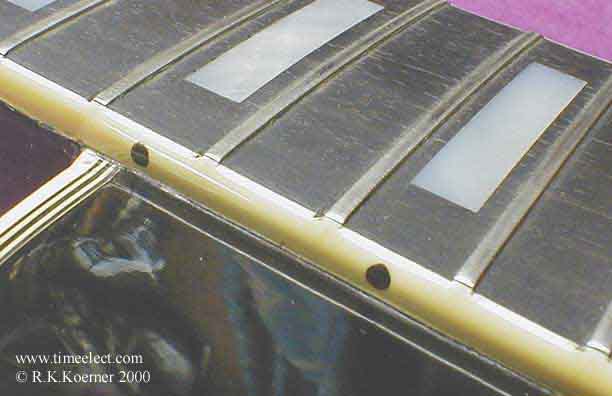
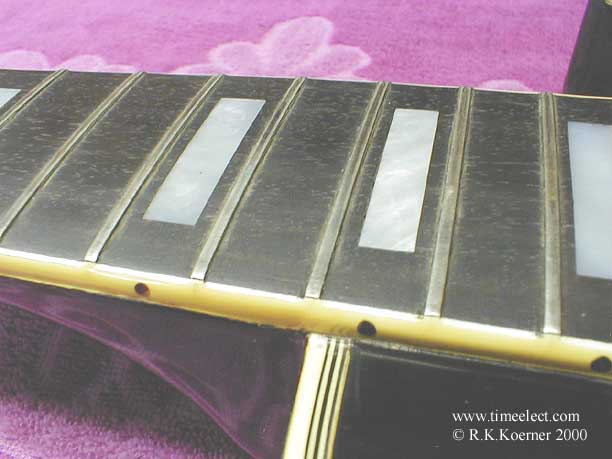
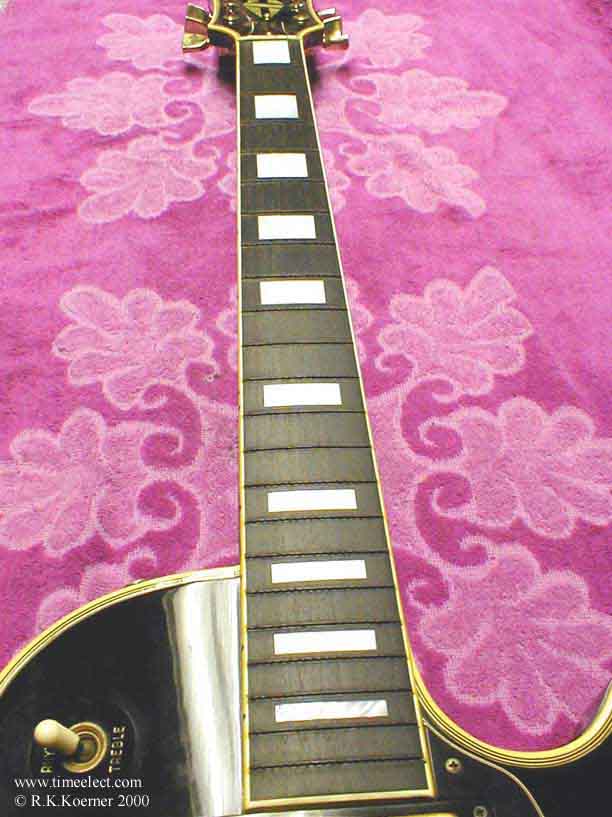
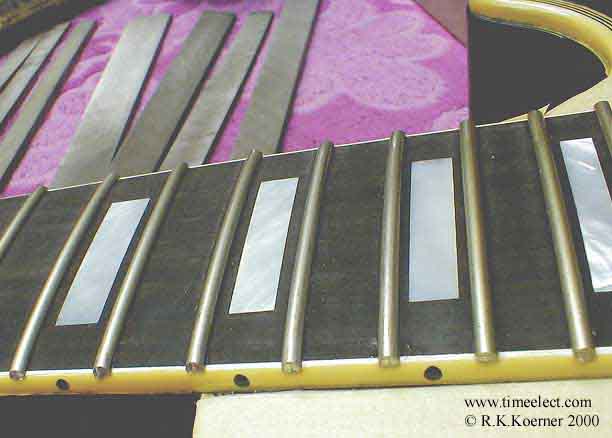
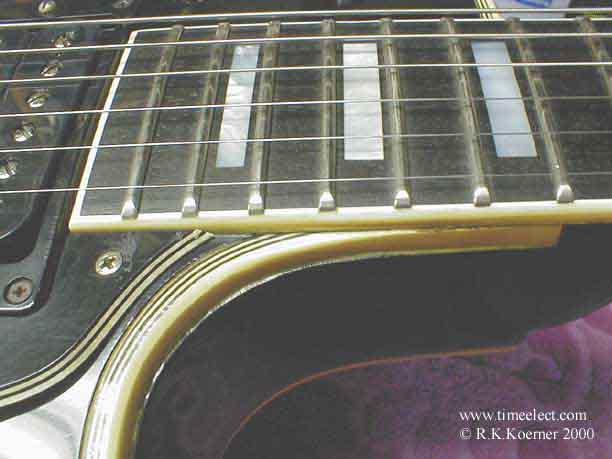
Here you can see that they are a very flat low fret, with the fret
shape extended through the binding.
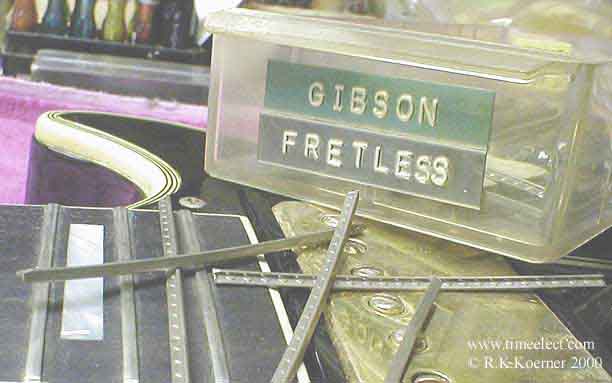
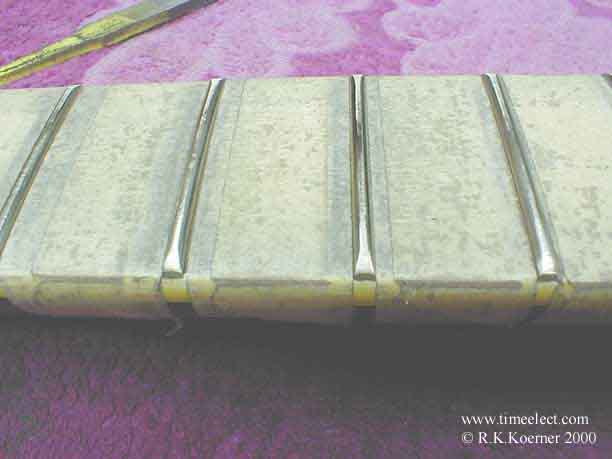
Here, is some of our limited left over stock of Original
Fretless Wonder Frets. As you can
see from the appearance of the NOS frets, there is little to no
wear on the frets on this old
1968 Gibson Les Paul Custom Guitar.
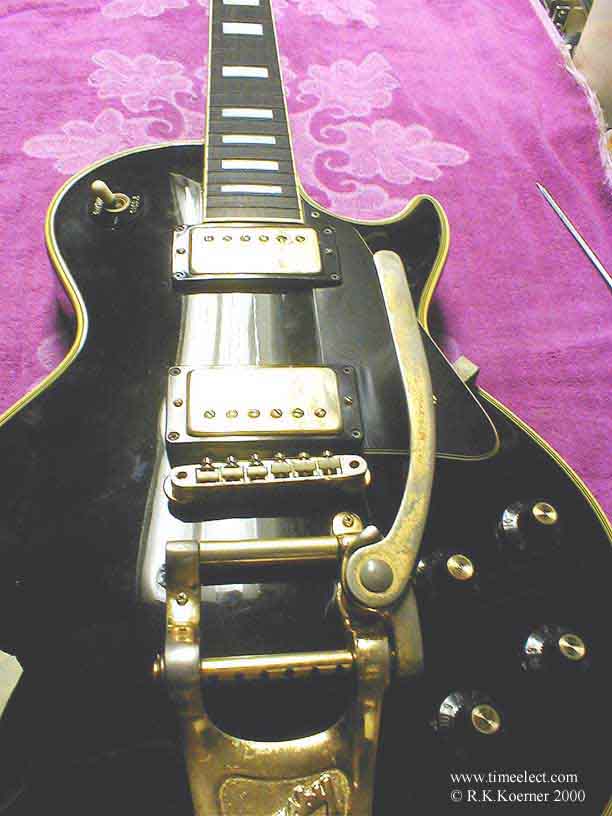
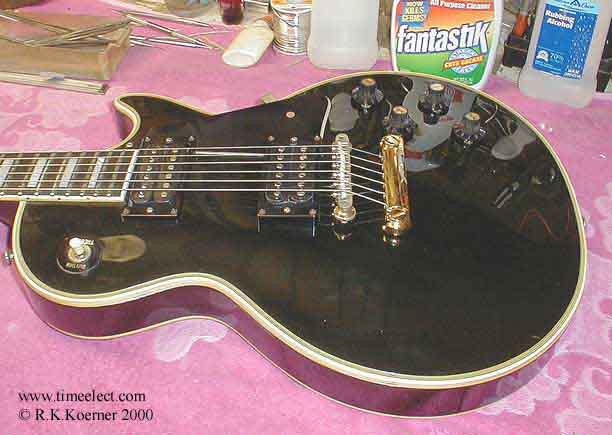
Here you see a picture of the guitar with the Bigsby Tremolo bridge
the guitar had on it.
The frets have now been removed. Because of the vintage
value of the guitar, the binding on the sides of the neck will not be replaced,
which is not the common practice by many luthiers today. There is
a preference to remove the binding at great risk, to make the job
go quicker.
At the time that Fretless Wonders frets were used, the violin
style of vibrato was very popular with most of the players of the day.
Though rare these days, some very old school Classical and Jazz players
may still use this violin vibrato technique while playing the guitar.
The owner of this guitar had a very difficult time bending
the strings, and applying the violin finger vibrato technique to the notes
that where fretted. For this reason, he selected a larger and higher
fret, which is more popular today.
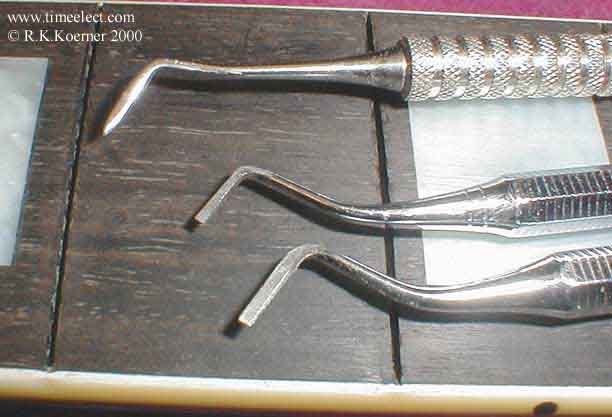
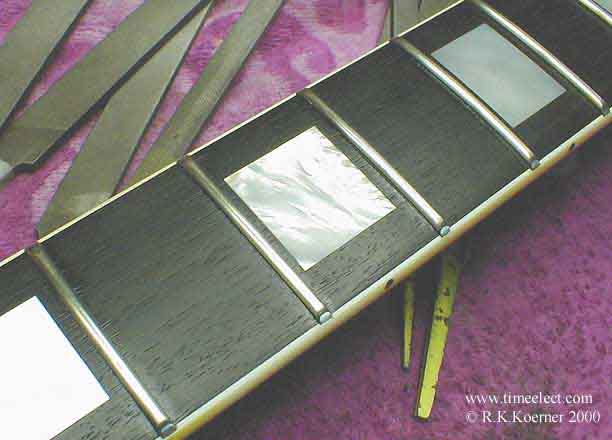
Here, you see some of the dental tools that I have had to
grind to shape, to hand clean and size the fret slots to properly accept
the size of the larger selected frets. The top tool is shaped to
cut through any glue used from the previous fret installation. The
tool in the middle is shaped to scrape the side wall, as well as reach
the bottom floor of the fret slots. The lower tool had been sharpened
and sized to enlarge the fret slots to the size needed for a tight fit
to the fret tangs. Compare the difference between the original size
fret slot on the left, to the newly sized fret slot on the right.
The fingerboard has also been sanded level, removing most
of the binding fret end caps. The binding edge just needs to be rounded
to start installing the frets.
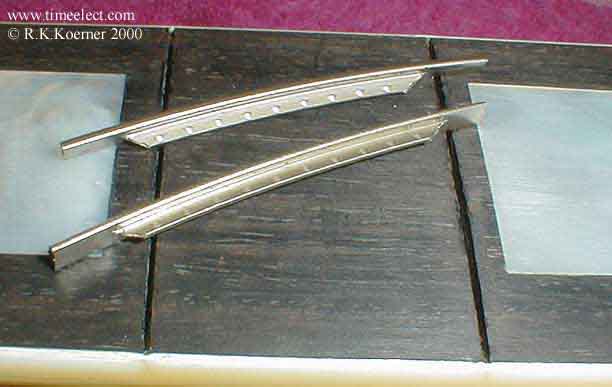
With the fret slot on the right now the proper size, the
frets now are cut from one continuous coil of fret wire. Then, each
piece is individually cut to the proper length. The fret tang or
tail, is relieved for the glue to escape, and prevent pressure build up
that will cause stress cracks in the binding at the ends of the frets.
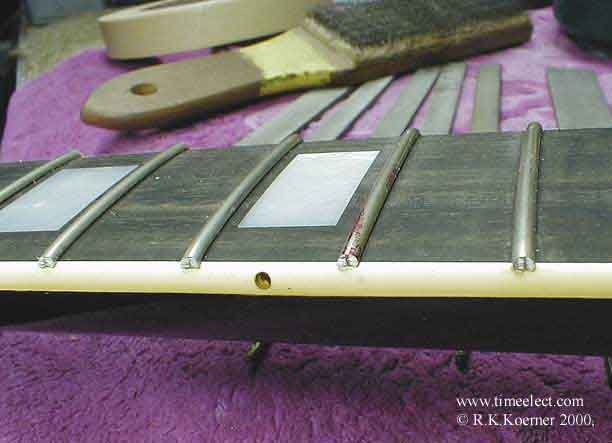
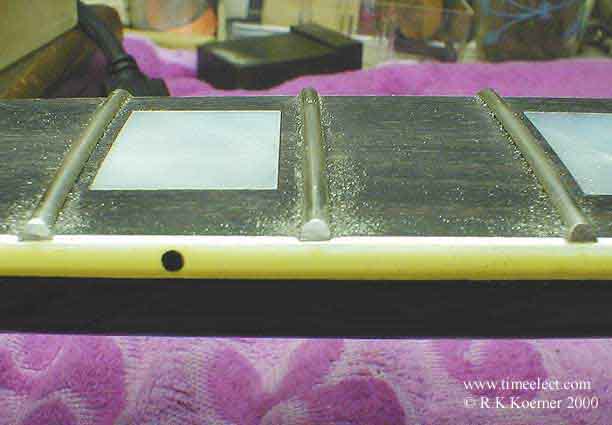
Here, you see the frets now installed with the ends cut to proper
length, over hanging the binding.
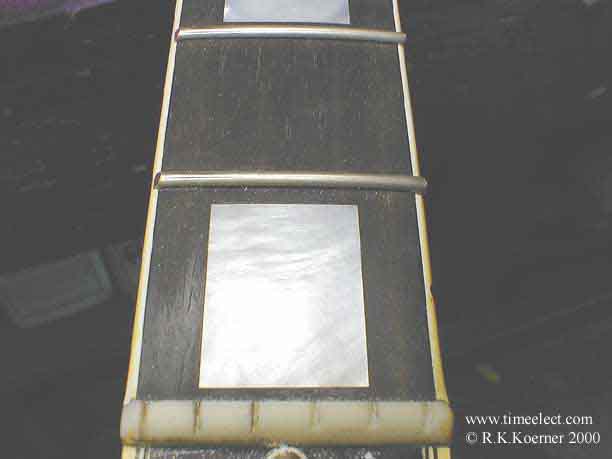
Here you can see the aged and yellowed binding that makes
all this effort most worth while. This was a most difficult picture
to take, as the flash from the camera tends to make the yellowed binding
look white.
Here, you see the ends of the frets have been rough filed to
shape.
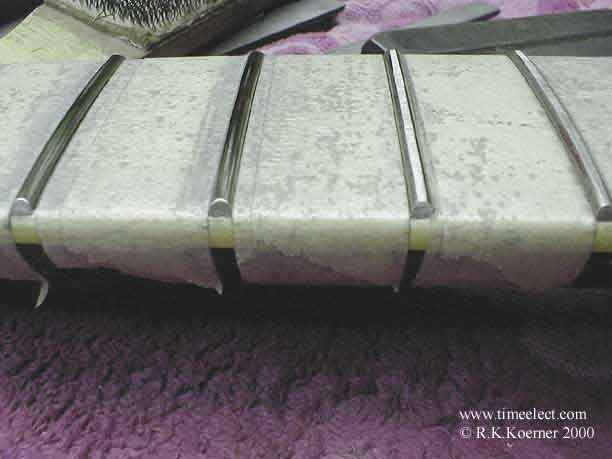
Here, you can see the proper amount of binding over hang the fret
should have on the left side.
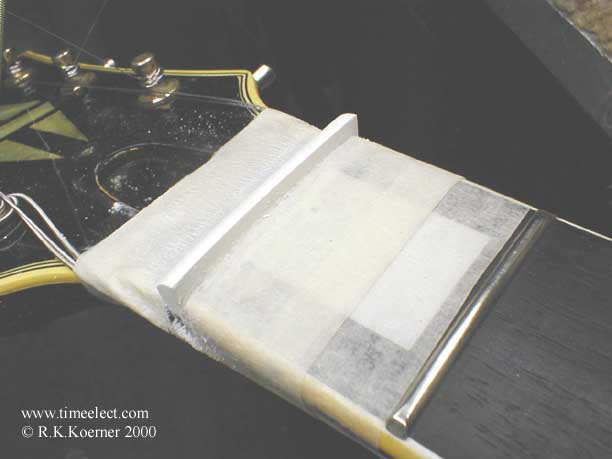
Now, the fingerboard is protected with masking tape and
the frets have been leveled, as you can see on the right side of the picture.
After the frets are leveled, they have to be re-crowned like the frets
on the left side of this picture shows.

Here, the frets have now been all re-crowned. Now
the ends of the frets have to be shaped so that the ends of the frets don't
appear as "speed bumps" to you fingers.
The "Speed Bumps" have been now rough filed to shape.
I forgot to mention that, all the tools I use can be seen in the background
of the pictures along the way. Besides the dental tools used, most
all the work was performed with common hand flat files.
Here, the polishing has been completed, and the oil has soaked mostly
into the wood.
The nut now is being replaced as the old ones slot spacing
is not correct for this neck any longer. Also, because of the increased
fret height, the shim required was very extreme, and would not be structurally
strong.
The nut replacement is now completed with the proper spacing.
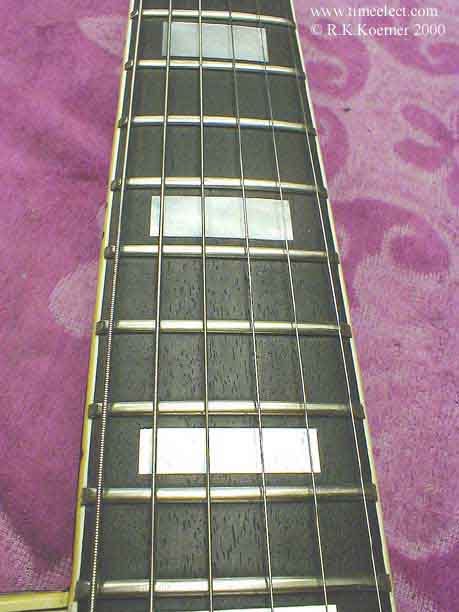
Here, you see the finished fret replacement with all the
proper adjustments made. When this is all done correctly, the player
should just place their hands on the guitar, just hang on, and go for the
ride.
The guitar should seem to do the playing for you!!
Along with the fret replacement, the Gold Bigsby had to
be removed, holes had to be drilled, then plugged in the top
and sides, and those places spot painted with a witches brew to match the
aged black painted finish.
The tail piece bushings had to be re-installed into the body, and
the grounding of the guitar restored. The old original pots and capacitors
still reside inside, and all other wiring connections have been resoldered.
The 3 position selector switch is also original too.
|
©Copyright R.K.Koerner 1997 All Rights Reserved.
|